How to Repair a Shed Roof
Published: 06/07/2021
As you’re here, we can tell you have a shed roof repair issue. But don’t worry – we’re here to help. We've divided this post into two main sections: The first section is about shed roof repair, and the second is about replacing shingles.
Breakdown of this article
- Even the best shed roofs take a beating
- Reasons you may want to repair a shed roof
- A word on health and safety
- How to refelt a shed roof
- How to repair shingles on a shed roof
There's a lot of information in this post. So if you want to skip to the relevant section, just click the appropriate link above. Otherwise, just keep reading...
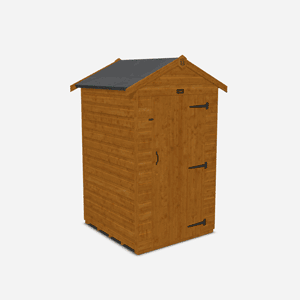
Even the best shed roofs take a beating
As we say in this post, even the best sheds face a lot throughout their lives – whether they’re taking a battering from wind and rain, or whether they’re being used as target practice during a game of football in the garden. With this in mind, you may need to repair your shed roof. But don’t worry – as long as the roof isn’t completely rotten, you’re unlikely to need a full-scale shed roof replacement. Whether you want to replace damaged shingles, you want to replace a small shed roof felt patch, or you’re looking into refelting an entire roof – we aim to give you all the help and advice you need.
Reasons you may need to repair your shed roof
Here are the three most common issues you may have with your shed roof:
Sagging
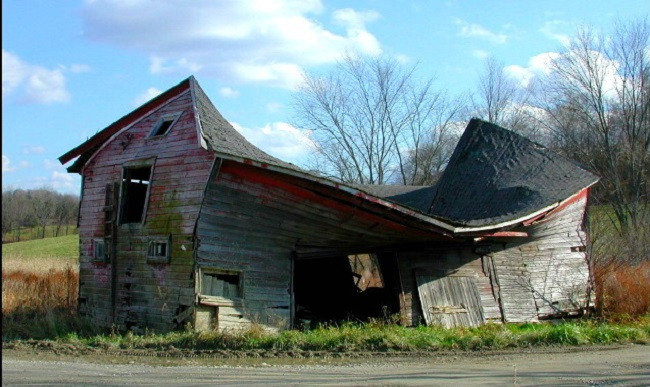
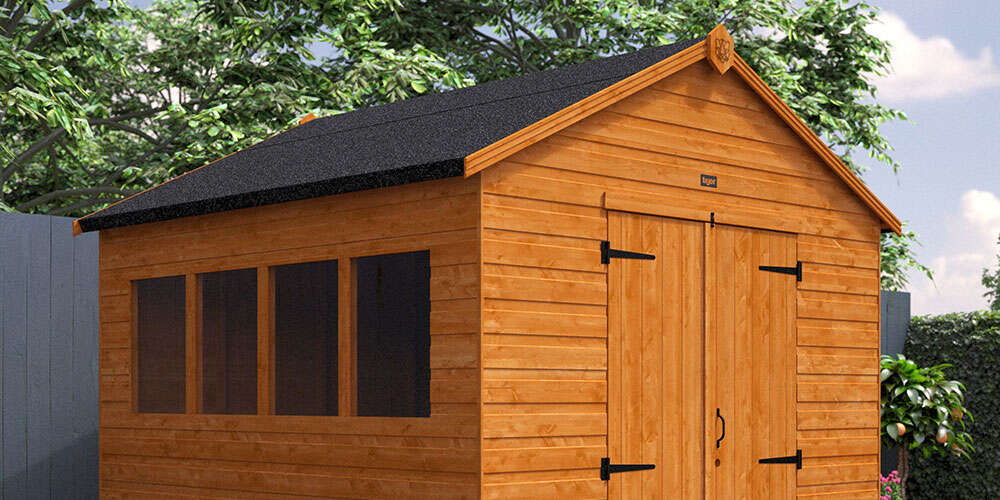
While a problem that can threaten any wooden roof, sagging is a particular issue for OSB and plywood shed roofs. These low-quality roofs are known for their lack of integrity – and they may even start to rot within months. While it can also cause roof leaks, a sagging roof is a sure sign of weakness that means you either to replace your shed roof or buy a new shed. But let’s face it – if your shed roof is so weak, then this may be a sign your shed roof needs replacing. Such issues may even be a sign that other wider issues could their rear heads in future. In which case, it’s probably a good idea to replace your shed. By contrast, tongue and groove cladding is tougher and less likely to dip and sag. Shed roofs with this form of cladding are built to last – which is why we offer a 20-year guarantee on all our garden buildings.
Exposed timber
Another cause of potential leaks and structural issues (including dipping and sagging), exposed timber is another major issue that can allow moisture and air to get inside. This can allow damp and mould to grow and lower the life expectancy of your shed. As we’ve already stated, both sagging and exposed timber can cause your shed roof to leak. And this is why leaks need special attention…
Leaks
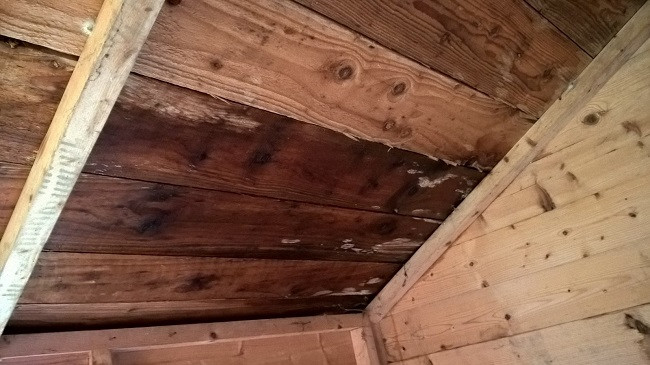
The most popular reason why you may need to repair a shed roof, leaks are not a good sign – and you shouldn’t ignore them. While it may be tempting to put off fixing the leak for a while, you should really get it fixed as soon as possible. Why? Because even the smallest leak could soon turn into something bigger. For example, moisture increases the chances of mould growing in the shed. If you spend a lot of time in your shed, this can irritate your eyes, throat, nose, lungs and skin [1]. Plus, it can also damage your tools and garden machinery through the build-up of rust. Leaks also threaten the life expectancy of your shed – no matter how solid your shed roof’s construction. This is because the build-up of moisture can rot wood – especially if left untreated. Roof leaks may occur due to a sagging roof, tears in the roofing felt, or cracked or missing shingles. While we recommend replacing a sagging roof (or getting a shed with a roof that isn’t likely to sag), it is relatively easy to replace damaged felt or shed shingles – and we aim to help you do just that…
Shed roof repair guide: How do you repair a shed roof?
Now you know WHY your roof may need attention, we’re going to show HOW to correct these issues. To make it easier to find the information you need, we’ve split this shed roof repair guide into three sections:
To find the relevant section, just scroll down (the sections are in the order above). Now you’re ready to start your garden shed roof repairs…
A word on health and safety
Many of the other shed roof repair guides on the web don’t mention health and safety – which is strange to us. Why? Because there’s nothing more important than making sure you stay safe when doing work like this. Shed roofs – especially broken or damaged shed roofs – are not equipped to support the weight of a full-grown man or woman. For this reason, you should stay away from the roof as much as possible and do the work while standing on your ladder instead. Make sure you let your family, friends or workmates not to go in the shed while you’re doing the work so they stay safe. Ideally, you should also have someone with you to hold the ladder (and perform certain other tasks) while you’re working. For more information on health and safety, read the Health and Safety Executive’s guide to walking and working on a fragile roof [2].
How to refelt a shed roof (or repair shed roof felt)
The tools listed below will make the whole process of installing roofing felt a whole lot easier - whether it's a simple felt roof patch repair, or a whole roof's worth of felt. This is your guide to putting felt on a shed roof... Here’s what you need:
- Green mineral roofing felt
- Hammer
- Tape measure
- A straight edge
- Craft knife or Stanley knife (must be sharp)
- Marker pen
- Flat-head screwdriver
- Clout nails
- Ladder
- Another person
Here’s how to do it:
1. Remove the finials and fascia boards
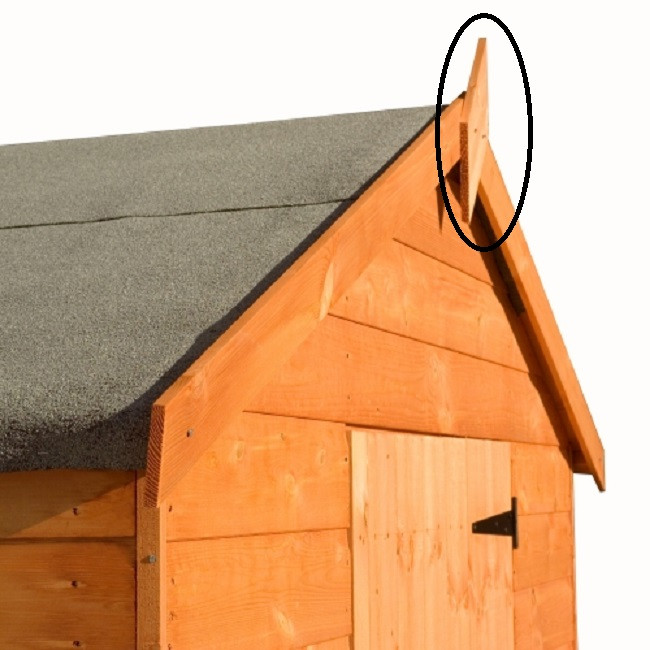
Both the finials and fascia boards will be attached with either screws or nails – so you’ll find them easy to take off with a flat-head screwdriver or the claw end of a hammer. If they’re nailed on, be sure to carefully prise the nails away from the roof to prevent damage. Put the finials and boards to one side. If the finials and/or fascia boards are rotten, you may wish to buy – or carve – new ones.
2. Strip off the old or damaged felt
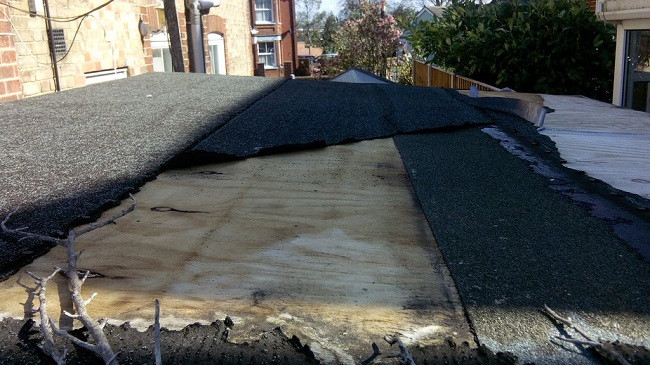
To make repairs easier (and to prevent damage to your shed roof), you need to make sure you get rid of the existing in the problem area...
How to remove felt nails
If the roofing felt is held in place with felt nails, use your flat-head screwdriver to remove each nail. Again, this should be easy to do. If you’re only replacing a section of the felt, take care not to rip the felt that is staying on the roof.
Can you put new felt over old felt on a shed?
We wouldn’t recommend refelting over old felt on a shed roof. By doing so, you could miss underlying issues with the structure - such as damp or rotten roof boards.
3. Measure the roof and cut the new roofing felt to fit
This is a key step in any guide on how to replace shed roof felt. Why? Because to do a good job, you need just the right amount. To start, measure the length of the roof. If you’re replacing all the old felt on your roof, cut the new felt to the same size. But if you’re only replacing a section of the felt, we recommend cutting at least 5cm (2 inches) too long – this creates overlap and offers a good margin for error that prevents any visible gaps.
How to cut roofing felt
If you're laying felt on a whole section (or an entire roof), use your tape measure and marker pen to mark three equal sections. Take your straight edge and your craft knife and cut the roofing felt to size. Be sure to do this on a hard, flat surface to ensure you're able to cut straight.
What kind of felt should you use?
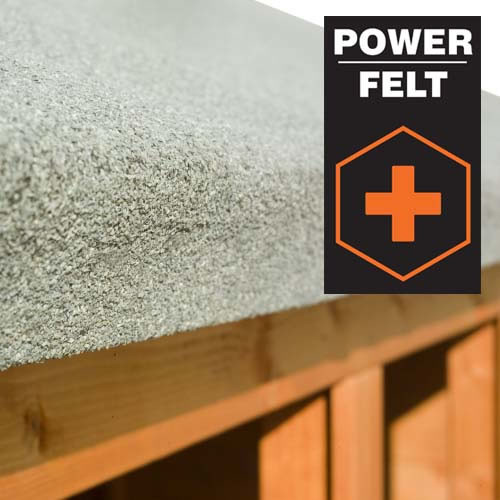
We recommend Tiger's Heavy-Duty Green Mineral Felt - the best shed roof felt around. It uses a multi-layer system with a fine finish that prevents mineral separation in cold weather. This, in turn, helps protect your garden building for longer - which is why it's featured on all our sheds.
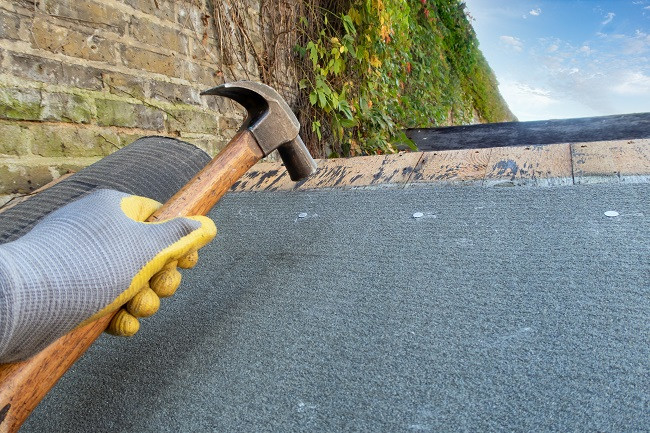
4. Smooth out and lay the new felt

Lay the felt on to the roof and smooth out any creases, bumps or wrinkles. Once again, the process of fixing roofing felt to a shed is pretty easy - just use your hammer to nail the felt to the roof at 15cm (6 inch) intervals).
5. Refasten the finials and fascia boards
Screw or nail the fascia boards and finials back into place. If you’re replacing the old finials and/or fascia boards, be sure to treat them with wood preserver, at least once a year, to keep them in good condition and looking good.
6. Keep an eye on the roof (at least once a year)
After refelting your shed roof, it’s free from damage and looks good – but you must take steps to keep it that way! With this in mind, check the roof at least once every 12 months – and look out for tears, rips and other signs of weather damage.
How to repair shingles on a shed roof

If your shed roof is old and most of the shingles are badly worn or damaged, it’s either to replace your roof or buy a new shed. But if just a few shingles are damaged on the building, it may ready for replacements. But don’t worry – this is an easy job with the right shed roof repair kit. Here’s how you do it: What you need:
- Replacement shed shingles
- Hammer
- Pry bar
- Clout nails
- Ladder
And here’s how to do it:
1. Remove the damaged shingles
Starting at the top of the roof, use the pry bar to prise the broken shingles away from the roof. Repeat this action by working your way across the roof – one row at a time.
2. Inspect the patch of roof beneath
When you remove each shingle, look for signs of any further damage underneath. If the felt remains in good condition and the wood beneath is solid (with no signs of damp or rot), go to step 3.
3. Replace each damaged shingle

The trick here is to avoid damaging the shingles around the spot where the damaged shingle was. Use your pry bar to lift the bottom row of nails in the shingle above and pull out the nails. Lay each new shingle and press down hard across the surface. Reinsert each nail through the readymade holes in the shingle above and use the hammer to push each nail into place.
How much does it cost to repair a shed roof?
Shed roof felt can cost as little as £3 per square metre (at the time of writing). Roof shingles cost around £10 per square metre (also at the time this article was published). The Checkatrade website is a good source of information on the cost of shed roof repair materials and labour (if required) [3].
References
[1] https://www.nhs.uk/common-health-questions/lifestyle/can-damp-and-mould-affect-my-health/ [2] https://www.hse.gov.uk/agriculture/experience/fragile-roof2.htm [3] https://www.checkatrade.com/blog/cost-guides/shed-roof-replacement-cost/