
How to Install a Plastic Shed Base Kit
Published: 20/09/2021
Thinking of installing a new shed but unsure what to do about the base? You’re not alone. A solid, level foundation is essential for the stability and longevity of any garden building, and a plastic shed base kit offers a quick, lightweight, and low-maintenance alternative to traditional concrete slabs.
In this guide, we’ll walk you through everything you need to know about installing plastic shed bases, from preparation to final placement. Whether you’re building a small storage shed or a larger log cabin, this step-by-step approach will help you create a strong, durable base with minimal fuss.
Why Choose a Plastic Shed Base?
Plastic shed bases are growing in popularity, and for good reason:
- Lightweight and easy to handle: No need for heavy lifting or specialist tools.
- Permeable and well-draining: Helps prevent water build-up and damp.
- Eco-friendly: Often made from recycled materials and fully recyclable themselves.
- Time-saving: Quicker and simpler to install than concrete, with no drying time.
- Cost-effective: Reduces the need for expensive materials and professional labour.
Ideal for DIYers and shed owners looking for a flexible, reliable solution, a plastic base kit ticks a lot of boxes, especially when time and ease are top priorities.
Tools and Materials You’ll Need to Install a Plastic Shed Base
Before you get started, it’s important to have everything ready. The right tools and materials will make the installation smoother, safer, and more effective, giving your shed the solid foundation it needs for long-term stability.
Your plastic shed base kit should include both the plastic grid system and permeable weed membrane. Double-check the contents before beginning. If anything is missing, contact your retailer before continuing with installation if it’s meant to be supplied.
Materials and Tools Checklist
- Plastic shed base grid system
- Permeable weed control membrane
- Pea gravel or angular gravel (around 8–10kg per panel) for filling the grid
- Tape measure for accurate sizing and layout
- Pegs and string to mark out the area
- Spade or shovel to remove turf and dig the base area
- Rake to level the ground and spread materials evenly
- Tamper or roller to compact soil or hardcore
- Spirit level or set square to ensure a flat, even surface
- Handsaw (optional) for trimming base panels if required
- Garden shed, ideally treated in advance with a quality wood preserver
Tiger Tip: Treat your shed before assembly with a long-lasting wood preserver or finish it with shed paint and a painting kit to protect against moisture, UV damage, and decay.
Essential Safety Gear
Even straightforward DIY tasks are safer with the right personal protection. Here's what you’ll need and why it matters:
- Protective gloves – to protect your hands while handling tools, gravel, or base panels
- Safety goggles – essential if you’re cutting plastic panels or working with loose materials
- Sturdy footwear or steel-toe boots – protects your feet when lifting heavy gravel bags or compacting ground
- Hearing protection (optional) – recommended if using power tools like a circular saw
Taking a few safety precautions at the start can prevent unnecessary injuries and keep your project on track.
Step-by-Step Guide to Installing a Plastic Shed Base
Installing a plastic shed base is quicker and easier than laying concrete or paving slabs, and just as durable when done correctly. Here’s a simple step-by-step guide to help you prepare the ground, lay your base, and get ready to build your shed or summerhouse.
Step 1: Prepare the Ground
Choose a suitable area for your shed, ideally one that’s level, stable, and well-drained. Avoid boggy or waterlogged ground and try to pick a flat surface. If your garden is on a slope, you’ll need to dig out and level the area before laying your base.
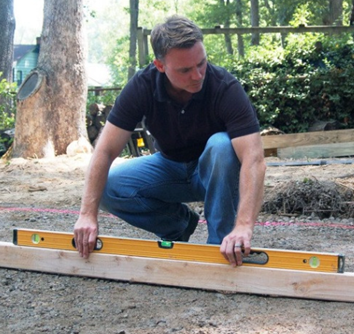
Use a tape measure, pegs, and string to mark out the area, ensuring it’s slightly larger than your shed base to allow for adjustments. Then use a spirit level or set square to check for evenness.
If the ground is uneven or sloping, add and compact a layer of hardcore or sharp sand to create a flat, solid surface. Compact it using a tamper or roller.
Step 2: Lay the Weed Membrane
Next, roll out a permeable weed control membrane across the prepared ground. This helps prevent weeds from growing up through your base while still allowing water to drain away.
Trim the membrane to size using scissors or a utility knife, making sure it covers the entire base area. You can secure it in place with landscape staples or small stones around the edges.
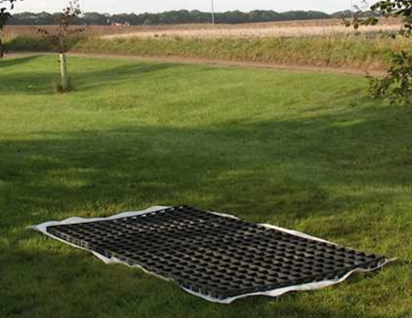
Step 3: Lay Down the Shed Base Kit
Now it's time to assemble your plastic shed base kit.
Most kits feature interlocking grid panels that clip together quickly and securely. For example, Ecobase Fastfit Plastic Shed Base panels measure approximately 500mm x 500mm, so for an 8x6ft shed you’d need at least five panels across and six panels down, depending on the specific layout.
If necessary, panels can be trimmed to size using a handsaw, especially for tight corners or non-standard shed footprints.
Position the panels directly on top of the weed membrane, ensuring all edges are aligned and the base sits flat across the ground.
Step 4: Fill the Spaces in the Grids with Pea Gravel
Once your grid system is in place, fill each section with pea gravel or angular gravel. This adds weight, increases stability, and promotes good drainage under your shed.
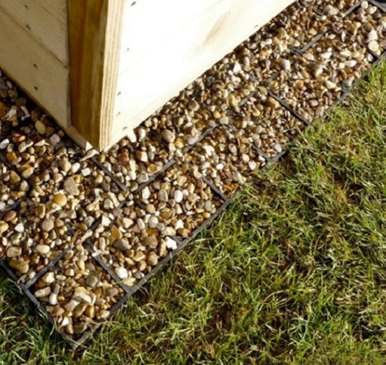
So, how much gravel for a plastic shed base? You'll typically need 8–10kg of gravel per grid panel but check your base kit for exact guidance.
For smaller sheds, you may choose to fill only the perimeter for appearance and drainage. However, filling the entire base is recommended for larger or heavier garden buildings to maximise support.
In addition to stability, gravel helps prevent water pooling beneath the shed, which reduces the risk of damp and rot.
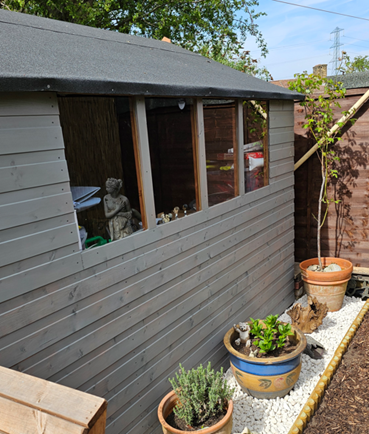
Step 5: Build Your Shed on Top of the Plastic Base
With your base in place, it’s time to assemble your shed or summerhouse. A plastic base provides a stable, level platform to build on, without the hassle of drying times or heavy groundwork.
Need help building your shed? Check out the complete guide to pre-build sheds and how to build a wooden shed.
Conclusion
Installing a plastic shed base is one of the easiest and most effective ways to ensure your shed stands strong for years to come. With a little preparation and the right materials, you can create a level, well-drained foundation that supports your garden building, whether it’s a compact tool store or a stylish summerhouse.
From preparing the ground and laying the weed membrane to filling the base with gravel and assembling your shed, the process is straightforward, budget-friendly, and ideal for DIYers. It’s a fantastic alternative to traditional concrete bases, especially if you want something quick, clean, and reusable.
Common Questions About Plastic Shed Bases
When choosing the right foundation for your shed, it’s natural to have a few questions, especially if you're considering a plastic shed base for the first time. Below, we’ve answered some of the most common queries to help you feel confident in your decision and your installation.
How much gravel do I need for a plastic shed base?
You’ll need enough gravel to fill the entire grid system of your plastic base to provide proper support and drainage. As a general guide, you’ll need around 8–10kg of gravel per panel, depending on the panel size and depth. Most standard bases require between 200kg and 400kg of gravel overall. Check the manufacturer’s recommendation for the most accurate figure.
Tiger Tip: Pea gravel or angular gravel is ideal for filling the grids and promoting drainage.
Can you cut a plastic shed base?
Yes, plastic shed base panels can be cut to size using a standard handsaw or circular saw if needed. This is especially helpful for custom-sized sheds or tight garden layouts. Always measure twice before cutting and wear protective gloves and eyewear.
Can you put a plastic shed base on grass?
Technically, yes, but it’s not ideal. Installing directly on grass can lead to uneven settling and drainage issues. It’s best to:
- Remove the turf
- Level the ground
- Add a weed membrane
- Lay down a layer of compacted hardcore or gravel before installing the base
This ensures your shed stays stable and well-drained over time.
How do you level the ground for a plastic shed base?
Follow these steps:
- Mark out your base area using pegs and string.
- Remove turf or loose soil to a depth of around 50–70mm.
- Compact the ground using a tamper or roller.
- Lay a weed control membrane.
- Add and level a layer of gravel or sharp sand.
- Check the area is flat using a spirit level before laying the base panels.
A well-prepared base is key to a long-lasting, solid shed. Check out how to build a shed base on uneven ground.
Can a plastic shed base support heavy sheds?
Yes. When properly installed and filled with gravel, plastic shed bases are extremely strong and capable of supporting up to several tonnes. They’re suitable for most timber sheds, garden offices, and even some log cabins. Always check the weight limits specified by your base kit manufacturer.
How long does a plastic shed base last?
A good-quality plastic shed base can last 20 years or more, thanks to its resistance to rot, rust, frost, UV rays and water damage. It’s a durable, low-maintenance option that won’t crack or degrade like concrete or paving slabs can over time.
Do I need a membrane under a plastic shed base?
Yes. A weed control membrane is essential to prevent weed growth and help with drainage. Lay it on the prepared ground before placing the plastic base panels. Some kits come with a membrane included, but if not, it’s easy to buy separately.
Is a plastic shed base suitable for sloped ground?
Plastic bases need to sit on flat, level ground. If your garden is on a slope, you’ll need to level the area first using compacted hardcore or gravel. For steeper gradients, consider building up the lower side or consulting a landscaper for more extensive groundwork.
Can I use a plastic base for all types of sheds?
Plastic shed bases work well for:
- Wooden sheds
- Plastic sheds
- Metal sheds
- Summerhouses
- Log cabins
However, if your building is very large, extremely heavy, or includes plumbing or electrical fittings, a more permanent concrete base may be more appropriate. Always check what your specific shed manufacturer recommends.
Is a plastic base kit better than paving slabs?
It depends on your needs, but for many homeowners, a plastic base offers big advantages:
- Easier and faster to install
- Lightweight and eco-friendly
- Allows excellent drainage
- Reusable if you move your shed
Paving slabs are heavier and more time-consuming to lay. Unless you need a high load bearing surface, plastic usually wins for speed and simplicity.
Ready to get started?
Explore our full range of sheds and garden buildings, browse our installation guides, or check out our range of wood paint, preservatives, and shed accessories to finish your project in style.
For more tips, inspiration, and how-to guides, head over to the Tiger Blog, or contact our team if you need help choosing the perfect shed base for your space.


