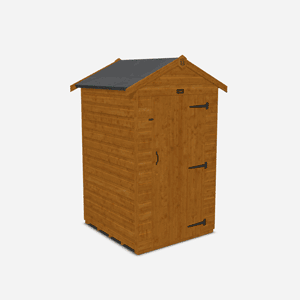
How to Build a Shed Base on Uneven Ground
Published: 17/05/2021
Why is a Level Base Important?
Before assembling your garden shed, one of the most crucial steps you can take is ensuring the base is level, stable, and correctly installed. While it might seem like a small detail, the base plays a massive role in the longevity, safety, and overall performance of your shed.
Here’s why it matters:
1. Structural Integrity
A level base ensures that your shed sits squarely and evenly on the ground, which is essential for the structural integrity of the building. When the base is uneven, the frame can twist or warp over time, causing the walls to become misaligned. This misalignment can affect the entire structure and lead to long-term issues — including difficulty opening and closing doors and windows, gaps in the framework, or even long-term structural failure.
2. Proper Water Drainage
A flat, level base promotes effective water drainage away from the shed. An uneven base can create low points where water collects, leading to puddles and pooling around or even under your shed. Over time, standing water can cause damage to the shed’s timber, weaken the base itself, and potentially lead to rot and decay. A well-installed base, ideally with a slight gradient for runoff, protects your investment from the ground up.
3. Air Circulation
Another often-overlooked benefit of a level base is airflow. Many garden sheds are designed to sit slightly above ground level on a raised timber or concrete base, which allows air to circulate beneath the structure. This ventilation is vital for preventing moisture build-up under the floor, which can lead to damp, mould, or mildew – all of which can compromise the interior and the contents of your shed.
4. Simpler Assembly and Long-Term Maintenance
A level base makes assembling your shed significantly easier. Panels will align more smoothly, fixings will be correctly positioned, and you won’t need to battle with misfitting parts during installation. In the long run, a well-supported, level base also helps reduce maintenance needs, as the shed will remain square, doors won’t drop, and windows won’t warp due to shifting over time.
5. Enhanced Aesthetics and Usability
Let’s not forget – a shed that’s sitting crooked never looks great. A level base ensures your shed looks sharp and professional in your outdoor space. It also ensures shelves, furniture, and storage inside the shed remain upright and functional, making your shed a genuinely usable and practical space from day one.
Tools You Will Need to Level Uneven Ground
Before you can enjoy your new garden shed, it’s essential to prepare the ground it will sit on — especially if your chosen spot is uneven. Creating a level base doesn’t require a professional contractor or specialist equipment, but having the right tools to hand will make the job far easier and ensure a solid, long-lasting foundation.
Whether you're tackling a gentle slope or more noticeable dips in your garden, here’s a simple checklist of tools and materials you’ll need to get the ground level and your shed project off to a strong start:
- Concrete foundation blocks
- A shovel
- Tape Measure
- Pegs and string
- Spirit level or set square
- Pressure-treated timber planks
- Hammer/ rubber mallet
- Nails
Why Use Concrete Foundation Blocks on Uneven Ground?

When building a shed on sloped or uneven ground, creating a level and stable foundation is essential — and that’s where concrete foundation blocks come into their own. They offer a practical, cost-effective, and highly adaptable solution for shed bases where the terrain isn’t perfectly flat.
Here’s why concrete foundation blocks are a great choice:
1. Versatile and Flexible
Concrete foundation blocks come in a variety of sizes, giving you the flexibility to design a base that suits your shed and your garden. Whether you’re working with a small storage shed or a larger garden room, these blocks can be arranged to create a tailored support structure.
2. Easy to Customise
Need to fine-tune your base layout? Concrete foundation blocks can be cut to size with a carbide-tipped circular saw, making them easy to work with even in trickier areas. This is especially useful when trying to fit blocks around corners or other fixed features in your garden.
3. Ideal for Uneven Terrain
One of the biggest advantages of using concrete foundation blocks is their ability to adapt to sloping or uneven ground. You can stack the blocks to compensate for height differences and create a level platform across varying terrain. This avoids the need for costly excavation or full concrete pours.
4. Stronger, Wider Base Options
If you need to support a heavier structure or want extra stability, you can double up the foundation blocks to create a wider and more supportive base. This is particularly useful for larger sheds or for areas where the ground may be softer or less compact.
5. Robust and Long-Lasting
These foundation blocks are built to last. Their solid concrete construction adds strength and durability to the shed base, helping to keep your shed stable over time, even under heavy use or changing weather conditions.
6. Cost-Effective Alternative
Compared to pouring a full concrete base, using concrete foundation blocks is significantly more affordable. You’ll save on materials, labour, and time — while still ensuring a strong and reliable foundation for your shed.
7. Important Note on Materials
It’s essential to use concrete foundation blocks specifically — not cinder blocks. While cinder blocks may look similar, they are not suitable for outdoor use in changing weather conditions. Cinder blocks are more porous and cannot withstand the freeze-thaw cycle, which can lead to cracking and failure over time. Concrete foundation blocks, on the other hand, are designed to withstand these seasonal changes, making them the right choice for your shed base.
How to Build a Level Base
Creating a strong, level base for your shed, log cabin, summerhouse, playhouse or any other garden building, is one of the most important steps in building your garden shed — especially if you're working with uneven or sloped ground. Not only does it provide structural support, but it also helps prevent issues like water pooling, sagging floors, or shifting over time. Follow these six steps to ensure your shed sits on a sturdy, long-lasting foundation.
Step 1: Remove Grass, Weeds and Other Vegetation
Start by clearing the area where your shed will be placed. Remove all grass, weeds, shrubs, and small trees — roots included. This helps prevent moisture from building up underneath the base and reduces the risk of plant regrowth that could compromise the shed’s stability later.
Tiger Tip: Don’t just clear the exact shed footprint — allow an extra border of around 12–16 inches (30–40cm) all the way around to give yourself room to work and to protect the shed from encroaching plants.
Step 2: Measure and Mark Out the Area
Once the ground is clear, measure and mark out the area using a tape measure, pegs, and string. Make sure your layout is square by checking the diagonal measurements — they should match. This outline will act as your guide as you level the ground and begin building.

Tiger Tip: Your marked area should be slightly larger than the shed’s footprint to allow space for maintenance and better water drainage.
Step 3: Level the Ground as Much as Possible
Now it’s time to dig in — literally. Use a shovel to even out the surface, removing high spots and filling in any low areas. Lay wooden planks across the ground to help spot uneven sections. You can also place a spirit level on the planks to check accuracy as you go.
If you’re using concrete foundation blocks, aim to roughly level the terrain, then use the blocks themselves to achieve a perfectly level base. As a guide, arrange four rows of three blocks for even weight distribution, adjusting block heights where necessary to suit the slope.
Step 4: Add a Weed Membrane
To extend the life of your base and prevent unwanted growth beneath your shed, lay down a quality weed membrane. We recommend using two layers — one laid lengthways and one widthways — for maximum coverage and long-term protection.
The membrane stops weeds pushing through your base and helps maintain airflow underneath, reducing the risk of rot and damp. Before you move on, check the area with a spirit level or set square to ensure everything is still even.
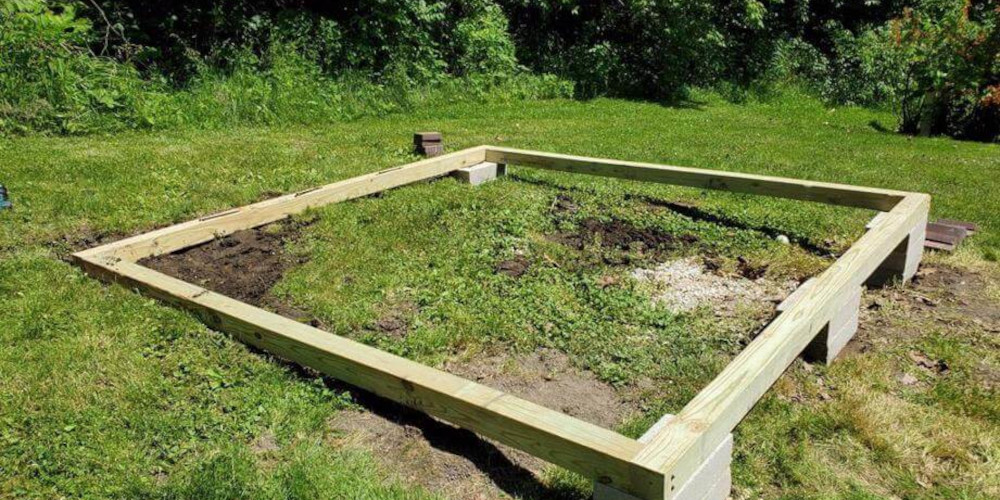
Step 5: Fix the Base to the Timber Planks
With the ground prepared and the membrane in place, it’s time to build the frame. Position your pressure-treated timber planks to match the shed’s footprint and use a hammer or rubber mallet to secure them in place. This frame acts as a strong outer support for your base and helps hold the concrete foundation blocks steady.

Nail the planks together firmly, checking all corners with a set square. A well-aligned timber frame ensures your shed walls and floor will sit perfectly flush and secure.
Step 6: Fill Gaps with Pea Gravel
Finally, fill the spaces between your concrete foundation blocks with pea gravel. This helps create a stable, level surface for the blocks to sit on, supports the shed floor bearers evenly (especially through the centre), and improves drainage. It also discourages wildlife from nesting beneath your shed by eliminating warm, sheltered gaps.
Once the gravel is in and the blocks are properly positioned and level, you're ready to build your shed on top — with confidence that your base is solid and built to last.
FAQ: Shed Base Essentials
How thick should a shed base be?
This depends on the type of base you're building. For concrete bases, we recommend a thickness of at least 75–100mm. For foundation block setups, ensure the timber bearers are well-supported at regular intervals to avoid sagging.
Can I put a shed directly on grass or soil?
We strongly advise against it. Placing a shed directly on grass or bare soil can lead to moisture problems, structural instability, and premature rot. Always create a proper base — such as foundation blocks, paving slabs, or a poured concrete pad — to give your shed the support and protection it needs.
What’s the best base for a shed on uneven ground?
Concrete foundation blocks are ideal for uneven or sloped ground. They’re stackable, customisable, and cost-effective. You can adjust the height of individual blocks to create a level platform without needing to dig or pour a full concrete slab.
Do I need planning permission for a shed base?
In most cases, no — especially if the shed is for domestic use and meets size limits under permitted development. However, if you're planning major groundwork or live in a listed building or conservation area, it’s worth checking with your local council.
Can I build a shed base myself, or should I hire someone?
Many shed bases — especially those using foundation blocks — can be built as a DIY project with the right tools and guidance. But if you're short on time, confidence, or dealing with tricky terrain, hiring a professional can give you peace of mind.
A Strong Start for a Long-Lasting Shed
Creating a level base is one of the most important steps in preparing for your shed build — especially if your garden ground is uneven. From removing vegetation and marking out your space, to levelling the ground, laying a weed membrane, and using concrete foundation blocks to create a sturdy, well-supported platform — every step plays a vital role in protecting your shed from moisture, movement, and long-term damage.
Whether you're building a small tool store or a spacious garden room, a solid base ensures your shed stands strong for years to come.
Now that you’ve mastered the basics of creating a level foundation, why not take the next step? Check out our step-by-step guides:
These detailed guides will walk you through each method, helping you choose the best base type for your shed and garden — and making your installation even easier.
Tiger Tip: A great shed starts from the ground up. Invest the time in getting the base right.