


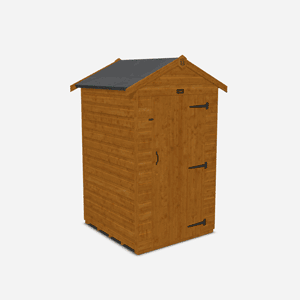
How to Paint a Shed or Summerhouse
Published: 09/09/2021

Painting your shed or summerhouse is about more than just giving it a fresh look, it’s one of the best ways to protect the timber from the elements and extend the life of your building. A well-painted shed can help prevent moisture damage, protect against UV rays, and reduce the risk of rot or mould, keeping your garden building in great shape for years to come.
Before you get started, it’s important to make sure your shed is in good condition. If the wood is damp, damaged or rotting, painting over it won’t solve the problem, and could even make it worse. Make any necessary repairs first, and always paint onto dry, sound timber for the best results.
This guide walks you through how to paint a wooden shed or summerhouse step by step, from preparation to finishing touches, and includes useful tips on paint types, tools, and techniques.
Tools and Materials You’ll Need to Paint Your Shed
Before you start painting your shed or summerhouse, it’s important to have the right tools and materials to hand. Using the correct equipment will not only make the job easier but also help you achieve a professional-looking, long-lasting finish.
Below is a list of everything you’ll need, whether you’re painting a brand-new garden building or refreshing an older one.
Core Tools and Materials
- Exterior wood paint or wood stain – Choose a high-quality, weather-resistant product designed for outdoor timber.

- Wood preserver – Essential for untreated timber to protect against rot and fungal attack. [Link to: Preserver Product]

- Primer – If required, especially for bare or sanded wood, or if you're switching from stain to paint.
- Paintbrushes and/or rollers – Use brushes for detailed areas and rollers for speed on larger panels. [Link to: Painting Kit]

- Dust sheet or ground cover – To protect patios, decking or lawns from drips and splashes.
- Masking tape – For neat edges around windows, doors and trims.

- Old newspaper or cardboard – Useful to place pots, brushes and paint trays on.
- Sandpaper or sanding block – To smooth rough or peeling surfaces.
- Cleaning solution or diluted detergent – For prepping the surface (mould or algae cleaner if required).
- Wire brush – Helpful for removing old paint or debris from weathered wood.
- Wood filler or sealant – For patching holes or cracks before painting.
- Hammer and nails – To fix any loose boards or trims before starting.
Essential Safety Gear
Staying safe while working with wood treatments and outdoor paints is important, especially if you’re sanding or using solvent-based products.
- Protective gloves – To avoid skin irritation from chemicals or paint.
- Dust mask or respirator – Essential when sanding or working in enclosed areas.
- Safety goggles – To prevent dust or paint splashes getting in your eyes.
- Protective clothing or apron – Wear something you don’t mind getting messy.
Step-by-Step Guide to Painting a Shed
With the right preparation, tools, and paint, it’s a straightforward DIY task that delivers a big visual impact and helps extend the life of your timber. Here’s our step-by-step guide below on how to paint a garden shed and/or summer house;
Step 1: Check your shed’s condition
Before painting, ensure your shed is in good structural shape with no significant rot, warping, or damage. Only proceed if the wood is completely dry and clean. Freshly pressure-treated timber must be left to dry thoroughly before applying paint or stain.
Step 2: Gather your tools and safety gear
To get started, you’ll need a high-quality exterior wood paint or stain, optional primer, a good brush and roller, masking tape, newspaper, and a dust sheet to protect surrounding areas. For prep and safety, gather gloves, a face mask, old clothes, and any repair materials such as wood filler, sandpaper, or a wire brush.
Step 3: Prep the surface
Begin by repairing any damage, filling cracks or holes with wood filler and replace any rotten wood. Next, clean the entire surface using a wire brush or outdoor cleaner to remove dirt, cobwebs and any flaking paint. Finally, use masking tape and newspaper to protect windows, hinges, handles and any other parts you don’t want painted and lay down dust sheets to shield nearby plants or flooring.
Step 4: Paint carefully
Start by painting the trims and edges with a brush, then move on to the larger panels, using a roller or wide brush and always following the direction of the wood grain. Apply at least two coats for the best coverage and weather protection, allowing each coat to dry thoroughly (typically around four hours) before applying the next. If you’d like, you can also paint the interior for a cleaner, more sealed finish.
Step 5: Let it Dry & Clean up
Once the final coat has dried completely, remove all masking tape, coverings, and dust sheets. Clean your tools thoroughly if you plan to reuse them, or dispose of single-use items responsibly. Step back and admire your freshly revitalised shed!
The Answers to All the Questions You Might Have When Deciding to Paint Your Shed
Painting a shed or summerhouse can feel like a big task, especially if it’s your first time. Below, we’ve rounded up answers to the most common questions people ask before getting started, from paint choices to prep work and practicalities.
Can you paint a pressure-treated shed?
Yes, but only once it’s fully dry. Pressure-treated timber is infused with preservatives that protect it from rot and insect damage, but it also means the wood can initially resist paint. You should allow the shed to weather for several weeks (often up to 6 months) before applying any paint or stain. Always check with the manufacturer and perform a water drop test, if water beads up on the surface, it’s not ready to paint.
Can you paint a shed with a roller?
Yes! Rollers are great for covering large, flat panels quickly and evenly. Use a medium- to long-pile roller designed for rough surfaces. For trims, corners, and around windows and doors, switch to a quality brush for precision.

Can you paint the inside of a shed?
You can, but it depends on how the space is used. If the shed is for storage only, there’s usually no need. However, if you’re using it as a workshop, garden office or summerhouse, painting the interior can help brighten the space, reduce dust, and protect the internal timber. Use low-odour water-based paints and ensure good ventilation during and after painting.
Can you use masonry paint on a shed?
It’s not recommended. Masonry paint is formulated for concrete, brick, or stone and may not adhere properly to timber. Instead, use paint that’s specifically designed for exterior wood, which will flex with the natural movement of timber and offer proper weatherproofing.
Do you need to prime a shed before painting?
It depends on the surface and wood paint you’re using. If your shed is new, untreated timber, a primer helps seal the wood and ensures better paint adhesion. If you’re painting over an old finish (like stain or existing paint), you may be able to skip priming – but always check the paint manufacturer’s guidance. Priming is especially important when switching from stain to paint.
How long does it take to paint a shed?
That depends on the size of your shed, the number of coats needed, and the weather. As a rough guide:
- Small shed: 3–5 hours total
- Medium to large shed: 6–10 hours
Factor in drying times between coats (typically 4–8 hours, depending on the product), and always check for rain in the forecast before you begin!
How much paint do I need to paint a shed?
It varies depending on the size and the number of coats. As a rough guide:
- A 5ft x 7ft shed: 2.5–3 litres for two coats
- A 10ft x 8ft shed: 4–5 litres for two coats
Always check the coverage rate listed on the paint tin (usually given in m² per litre) and buy a little extra for touch-ups.
What’s the best weatherproof paint for a shed?
Look for exterior wood paints that are specifically designed to be weather-resistant, UV-protective and breathable. Options include solvent-based or high-quality water-based paints, and many brands offer long-lasting formulas with 5+ years of protection. [You could link to your recommended paint range here.]
Can you paint over a stained shed?
Yes, but it depends on the type of stain. If it’s a semi-transparent stain or wood treatment, you may need to sand and prime the surface before applying paint. For solid-colour stains, a good clean and light sanding is often enough. Always test a small patch first.
Should you paint a shed if it’s old or damaged?
Only if the structure is still sound. If the timber is damp, rotting or warped, painting may trap moisture and cause further problems. Make necessary repairs first – replace any damaged panels, fix loose boards, and treat any mould or mildew. Paint only onto clean, dry, healthy timber.

If you fancy doing something a bit different with your shed paint, take a look at these cool and funky garden shed ideas.

Conclusion
Painting a shed or summerhouse is a great way to refresh your outdoor space, protect your building from the elements, and inject a bit of personality into your garden. You can also check out our complete guide to pre-built sheds here and how to paint and maintain your log cabin.
To recap, here’s the process:
- Check your shed’s condition – only paint when the wood is dry, clean, and in good shape.
- Gather your tools and safety gear – a good quality brush, roller, dust sheet, and wood paint are essential.
- Prep the surface – clean, sand, and prime if necessary.
- Paint carefully – follow the grain, use multiple coats if needed, and allow proper drying time.
Ready to get started? Browse Tiger’s full range of wood paints and kits to find the perfect finish for your shed. For more tips and ideas, check out our other how-to posts in the Tiger Hip Horticulturist Blog.


