
How to Dismantle a Shed
Published: 11/08/2021
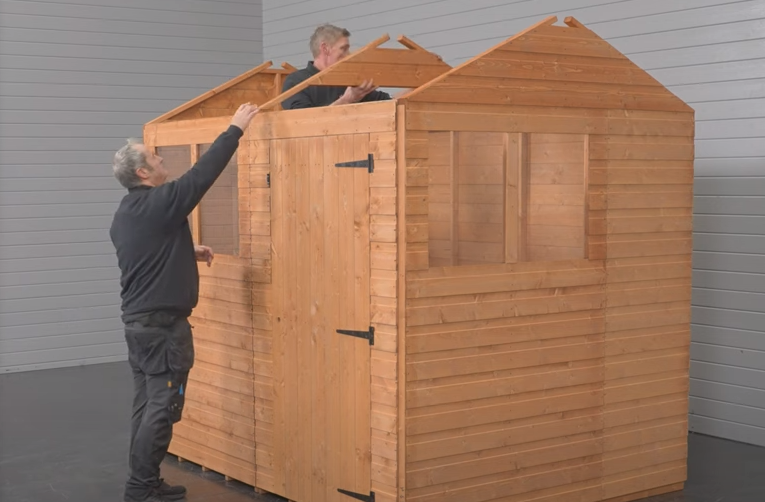
As you’ve arrived on this page, it’s clear you want to know how to dismantle a shed. But while this may seem a daunting task, it can be easy (as long as you follow some simple steps). Perhaps you want to know what to do with an old shed. And if you want to know whether your shed can be disassembled safely (due to age or condition), we're here to help. Or maybe you'd like to know how to disassemble a shed for relocation – and you're looking to avoid causing any damage during the dismantling process. You could even be concerned about how much it costs to hire a shed dismantle-and-removal service, and you want a step-by-step guide to help save money. Well, you’re in luck! In this post, we aim to answer any questions you may have before taking you through each step you need to take to dismantle your shed – the right way…
How Much Does It Cost to Dismantle a Shed?
As an article on the Checkatrade website states, it can cost between £150 and £325 to pay someone else to dismantle and remove an old shed (at the time of writing) [1]. But if you’re wondering how to dismantle a shed yourself (or with a friend), this is clearly the most frugal option; all it’ll cost is your time and effort.
How Long Does It Take to Dismantle a Shed?
The amount of time it’ll take to dismantle your shed depends on the following factors:
- The size of the shed
- How many people are performing the task
- The tools you have available
As long you have the right tools and at least one person is helping to take the shed apart, dismantling the building shouldn’t take you more than a few hours. However, larger sheds can take more time to dismantle than smaller garden buildings. The process of dismantling a shed is pretty much the reverse of assembling it. So, if it didn’t take you too long to construct it, it’s unlikely to take you too long to dismantle it either.
Note: The number of people who’ll be dismantling the shed is particularly important. In the interests of safety and efficiency, at least two people should dismantle the shed – please don’t attempt it on your own!
What Tools Do You Need to Dismantle a Shed?
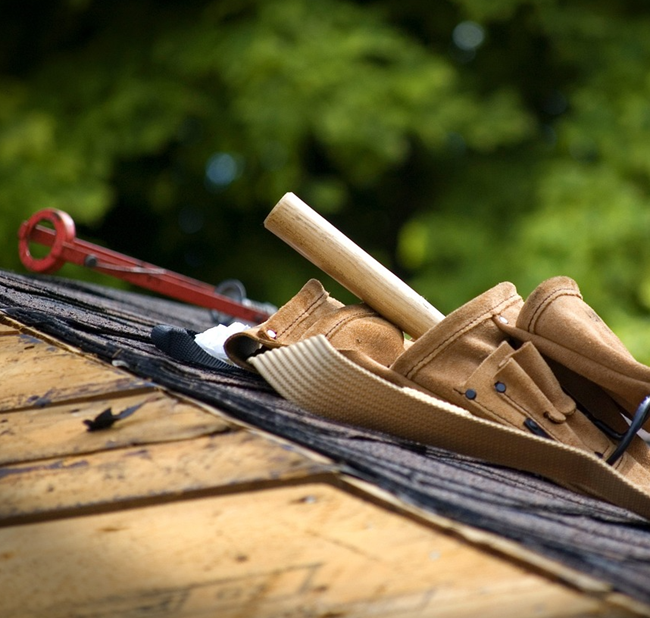
For the sake of both safety and speed, it’s important you have the right tools for the job. To dismantle a shed, you will need:
- Hammer
- Electric screwdriver
- Flat-head screwdriver
- Gloves
- Ladder
As you can see, you don’t need many tools to dismantle a shed. That said, all of those listed above are important. In particular, the electric screwdriver will speed things up (and save you a few muscle aches to boot!).
Instructions to Dismantle a Shed
The following guide shows you how to dismantle a pent shed, apex shed – and pretty much any type of shed.
Take Note of Possible Issues
Before deconstructing the shed, you need to make sure you’re aware of any potential issues. They may include the following:
- Heavy Parts: If there are any heavy parts, you need to make sure you’re ready to carry, or move, the weight – which means the person giving you an extra pair of hands also needs to be ready to help you.
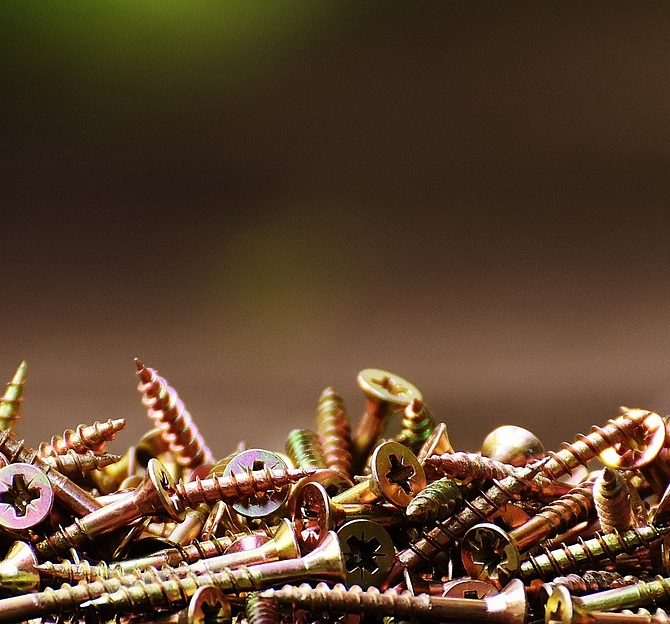
- Rusty Nails or Screws: Take note of any rusty screws or nails and find a container to keep them out of harm’s way while you work. You can then dispose of them when you finish.

- Reusable Screws: If the screws are in good condition, find a container to keep them in. That way, you won’t lose them and can use them to reconstruct the shed when you’ve moved it (if that’s what you plan to do).
- Debris Disposal: This will be especially important if the shed you want to disassemble is rotten. In this case, it is likely to create debris when you take it apart. Think about where you’ll put this debris (out of harm’s way) until you’ve finished the dismantling process and can dispose of it properly.
- The Shed Base: If you’re dismantling the shed to move to another location, you need to be aware that you may not be able to move the base – especially if the base is made of concrete. Likewise, if you’re dismantling an old shed to build a new one in the same place, you must make sure the base is in good enough condition to hold your new shed.
Remove Finial, Fascia and Trim
Are we dealing with screws or nails holding things in place? Once we've got that sorted, grab your tools – an electric screwdriver or hammer – and make sure you've got a sturdy ladder nearby. Safety first! Once the area is clear and the shed is stable, it's time to get removing! Unscrew or pry away those attachments carefully, keeping an eye out for any damage. Dispose of the old bits responsibly, tidy up, and voila!
1. Identify Fastening Method: Before starting, take a close look at the finials, fascia, and trim to determine how they are attached to your shed. While they are commonly secured with screws, they may also be fastened using nails. Understanding the fastening method will help you choose the appropriate tools and approach for removal.
2. Gather Tools: Depending on the fastening method, you will need either an electric screwdriver with the appropriate bit or a hammer with a claw. Additionally, have a sturdy ladder or step stool on hand if the finials, fascia, or trim are located out of reach.
3. Prepare Work Area: Clear the area surrounding the finials, fascia, and trim to provide ample space for manoeuvring and working comfortably. Remove any obstacles or debris that may impede your progress. If necessary, position the ladder or step stool securely to access higher areas of the shed.
4. Secure the Shed: Ensure that your shed is stable and securely anchored to the ground before proceeding with the removal process. If the shed is freestanding, consider having a helper assist you in stabilizing it to prevent any accidental movement or instability during removal.
5. Removing Finials: If the finials are attached with screws, use your electric screwdriver equipped with the appropriate bit to loosen and remove them. Start from the top of each finial and work your way down to ensure systematic removal. Be cautious not to overtighten the screws or strip the screw heads. If the finials are nailed in place, position the claw of the hammer underneath the finial and gently pry it away from the shed. Repeat this process for each finial.
6. Removing Fascia and Trim: Similarly, assess the method of attachment for the fascia and trim. If they are secured with screws, use your electric screwdriver to carefully remove them, taking care not to damage the surrounding material. Work methodically from one end to the other, keeping track of the screws as you remove them. For fascia and trim fastened with nails, utilize the hammer claw to pry them away from the shed gradually. Apply gentle pressure to avoid splintering or causing damage to the shed's exterior.
7. Inspect for Damage: Once the finials, fascia, and trim have been removed, take a moment to inspect the shed's exterior for any signs of damage or wear underneath. Look for areas where the paint or siding may have been affected by the attachment points. Address any issues promptly to ensure the structural integrity and aesthetics of the shed are maintained.
8. Dispose or Store: Dispose of any damaged or unwanted finials, fascia, and trim appropriately, following local disposal regulations. If the components are in good condition and you intend to reuse them, store them in a designated area for safekeeping until needed.
9. Clean Up: Clear away any debris, screws, or nails left behind from the removal process to prevent tripping hazards or damage to the surrounding area. Dispose of the debris in a suitable container or trash receptacle, ensuring proper disposal procedures are followed.
10. Proceed with Renovation: With the finials, fascia, and trim successfully removed, you can now proceed with any further renovation or maintenance tasks on your shed without obstruction. Whether you plan to repaint, repair, or upgrade the shed, you have now cleared the way for seamless progress.
Always exercise caution and prioritise safety throughout the removal process, wearing appropriate protective gear such as gloves and safety goggles. If you encounter any difficulties or are unsure about any step, consider seeking assistance from a professional to ensure the task is completed safely and effectively.
Remove Windows
First off, take a good look at those windows. Are they nailed, screwed, or maybe even just snugly fit in there? Once you've sussed out how they're attached, grab your tools – maybe a screwdriver or a pry bar – and get ready to work some DIY magic. But hey, safety goggles on, gloves at the ready, and make sure you've got a clear workspace.

1. Prepare Tools: Gather your toolbox and ensure you have a screwdriver suitable for removing the screws holding the window frames in place.
2. Assess Window Material: Determine if your shed windows are made of glass, styrene, Perspex, or another material. This will influence the approach you take during removal.
3. Unscrew Window Frames: Using your screwdriver, carefully unscrew the window frames from the shed structure. Take your time to avoid stripping the screws.
4. Handle with Care: If the windows are made of glass, proceed cautiously. Support the panes from underneath as you remove them from the frames to prevent breakage.
5. Slow and Steady: Gently ease the glass panes out of their frames, ensuring a steady and controlled movement to minimize the risk of shattering.
6. Cushioning Option: For added protection, consider placing a soft cloth or towel beneath the pane as you remove it to cushion any accidental impacts.
7. Styrene or Perspex Panes: If your windows are made of styrene or Perspex, handle them with care but know they're more forgiving than glass. Still, take your time to prevent scratches or damage.
8. Inspect Frames: With the panes removed, inspect the window frames and sills for wear or damage. Address any issues before proceeding with further renovation or maintenance.
9. Dispose of Panes: Dispose of glass panes responsibly to avoid any safety hazards. Styrene or Perspex panes can be stored for potential reuse or disposed of accordingly.
10. Cleanup: Clear any debris or screws from the removal process, ensuring the work area is clean and safe for future tasks.
11. Proceed with Renovation: With the windows successfully removed, you're ready to move on to the next phase of your shed renovation project. Whether it's painting, repairs, or upgrades, you've cleared the way for progress!
Remember to prioritise safety throughout the removal process and take your time to avoid any accidents or damage. If you encounter any difficulties or uncertainties, don't hesitate to seek assistance from a professional.
Take Off Doors
Before diving into your shed renovation project, let's start by tackling one of the most essential components: the doors. Whether you're giving your shed a fresh coat of paint or making structural improvements, removing the doors is a crucial first step. Follow these detailed instructions to ensure a smooth and successful door removal process.
1. Prepare Tools: Gather the necessary tools for the job, including a screwdriver or drill with appropriate bits for removing screws, a hammer, and a pry bar if needed. Additionally, have a container ready to store the screws and hardware you'll be removing.
2. Assess the Door: Take a moment to inspect the door and its components. Note the location of hinges, catches, locks, and any other metal parts that need to be removed.
3. Loosen Hinge Mounts: Using your screwdriver or drill, begin by unscrewing the hinge mounts from both the door and the shed frame. Work systematically, starting from the top hinge and working your way down to the bottom. This helps prevent any sudden shifts in the door's weight during removal.

4. Support the Door: Once the hinge mounts are loosened, ensure the door is adequately supported to prevent it from falling or swinging freely. If necessary, enlist the help of a friend to hold the door steady while you work.
5. Remove Hinges: With the hinge mounts detached, carefully remove the hinges from both the door and the shed frame. Place the screws and hinges in the designated container to keep them organized for reassembly later.
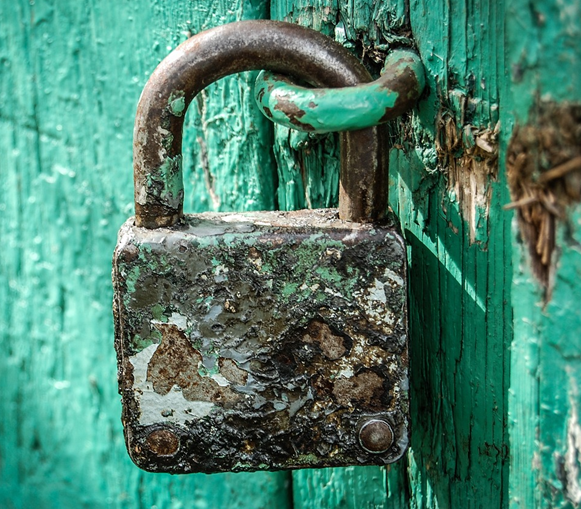
6. Detach Catches and Locks: If your door is equipped with catches, locks, or any other metal hardware, remove them using the appropriate tools. Pay attention to any screws or fasteners securing these components and store them with the rest of the hardware.
7. Store Hardware: Store the screws and hardware removed from the door in a safe place, such as a labelled container or resealable bag.
8. Clean Up: Clear away any debris or dust from the door removal process, both inside the shed and around the exterior. This creates a clean workspace for the next phase.
By following these detailed steps and exercising caution throughout the door removal process, you'll ensure a smooth and efficient shed dismantling process. If you face any challenges or uncertainties, don't hesitate to seek assistance from a knowledgeable friend or professional.
Remove Roof Coverings
The extent of this step depends on what is covering your roof. Most garden building roofs are covered in shed roof felt alone. However, some sheds feature shingles on top of roofing felt.
- To Detach Shingles: As we state in our post on shed roof repair, you can prise off shingles easily using a hammer claw (or pry bar). If you want to move your shed and the shingles are still in good condition, take care not to damage them as you may wish to reattach them once you’ve moved the shed.
- To Remove Roof Felt: To remove the roof felt, use your flat-head screwdriver to pull the tacks off and put the felt to one side (ready to dispose of it later).
Take Off Roof Boards and Gables
Due to the weight and height (how far from the ground they are), taking off the roof boards will be the hardest and most awkward part of this process – both you and the other person (or people) helping you need to concentrate on this.
The roof will be constructed of separate boards or panels, so you must deconstruct the roof in sections – each one is likely to be screwed or nailed on. Use your electric screwdriver or hammer claw to detach each of the panels, while your partner holds the panels up to stop them falling. Once you unscrew each board or panel, remove it with care and place it to the side. If you’re moving your shed to another location, you’ll want to put each panel/board in a place where it won’t get damaged. You’ll also want to keep each screw or nail in a container, so it doesn’t get lost.
If the building is an apex shed, you also need to remove the gables. Again, use your electric screwdriver to remove each screw until the gables come loose and you’re able to remove them.
Remove Walls
Your method here depends on whether you have a tongue and groove shed or an overlap shed.
- Detaching Tongue and Groove Walls: Because of the way in which tongue and groove panels slot together, there are likely to be fewer nails or screws (if any). Use the hammer claw to gently lift each board or panel until you feel it come away from its surrounding panels and pull it away. Repeat this process until you’ve completely removed the walls.
- Detaching Overlap Walls: If the shed uses the more traditional overlap panels, use your hammer claw to remove the nails and take each panel off one by one.
Take Up the Floor
The final step in this process is to remove the floor of the shed. Most shed floors are screwed or nailed together, although some use screws sparingly (as in the case of tongue and groove floors, for example). Use your electric screwdriver to detach any screws and place them into the relevant container for safe keeping. Some floors will come apart right away – at which point, you can start removing each panel. If the floor is made from tongue and groove panels, then you may need to use the hammer claw to gently prise each board apart. At this point, you've dismantled your shed - and all that's left to do is tidy up!
How to Dispose of your Shed
Looking to clear space in your backyard or upgrade your outdoor storage solution? Saying goodbye to your garden shed might seem like a daunting task, but there are numerous options available to help you dispose of it efficiently. Whether you're looking to repurpose materials, donate to a good cause, or simply clear the area, here are some ideas to consider for getting rid of your garden shed:
1. Dismantle and Recycle: Take apart the shed piece by piece, salvaging materials like wood, metal, and roofing for recycling or reuse in other projects.
2. Sell or Give Away: If the shed is in good condition, consider selling it online or through local classifieds. Alternatively, offer it for free to someone in need of outdoor storage.
3. Donate: Reach out to local charities, community centres, or schools to see if they could benefit from the shed for storage or as a shelter for outdoor activities.
4. Repurpose: Convert the shed into a different structure, such as a greenhouse, playhouse, or workshop, to give it a new lease on life.
5. Hire a Removal Service: If dismantling the shed yourself seems daunting, hire a professional removal service to take care of the job safely and efficiently.
6. Use as Firewood: If the shed is made of wood and no longer usable, consider dismantling it and using the wood for firewood or other outdoor projects.

7. Recycling Centre: Take any non-reusable materials from the shed to a local recycling centre for proper disposal, ensuring environmentally friendly practices.
8. Upcycle: Get creative with repurposing shed components into new and innovative projects, such as garden planters, outdoor furniture, or decorative accents.

9. Composting: If the shed is made of organic materials like wood, consider composting it to enrich your garden soil.
So, wrapping up our shed-dismantling adventure, it's all about taking your time, getting creative, and doing it safely. Whether you're turning it into a DIY project, recycling the materials, or passing it on to someone who could use it, there's plenty of ways to give your old shed a new lease on life. Just remember to keep those safety goggles on, have some fun with it, and who knows? You might even uncover some hidden treasures along the way! So go ahead, tackle that shed with confidence, and let's see what new adventures await in your revamped outdoor space. Happy dismantling!
Reference
[1] https://www.checkatrade.com/blog/cost-guides/cost-remove-old-shed/