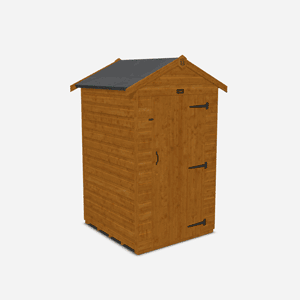
Why Build a Base for Your Shed?
It is essential that all garden buildings are assembled on a firm and level base, constructed from an appropriate, durable material.
Without the correct base, buildings can be very difficult to assemble. This may lead to the future deterioration of the product — such as doors dropping out of alignment and becoming difficult to operate, or the source of water leakage.
Assembling a garden building on an incorrect base is also likely to invalidate any guarantee that your product may carry.
Where to Build a Base for Your Shed
When deciding where to place your garden building, you need to take a few things into consideration.
Firstly, remember not to place the base too close to any walls or fences, as there may be a slight overhang on the roof of the garden building.
Secondly, placing the base next to trees or large bushes could also cause problems from overhanging branches, especially if these are likely to grow and come into contact with the building in the future. In this case, cut these branches in advance.
Once the garden building has been assembled, check overhanging foliage regularly as any rubbing on the roofing felt may lead to your garden building becoming susceptible to rain and extreme weather conditions.
Furthermore, when deciding the optimum location for your base, consider the access available to your garden building:
• Ensure the base position allows access around each side of the garden building to apply wood treatments or preservative.
• Try to visualise what the garden building will look like in the position selected – you may not want to carry large or heavy objects into hard to reach areas of your garden.
• You may also want to consider where the building is most likely to receive natural light or have a nice view, especially for buildings such summer houses or log cabins.
• Finally, if you intend to fit an electricity or water supply to your garden building, you may need to consider where would be most appropriate to cater for this (i.e. distance to mains electricity/water supply).
How to Build a Shed Base
To construct a professional base, we recommend using a reputable local builder or handyman. However, if you feel comfortable with the task, then it is relatively straightforward to construct your own base.
This guide will help you to prepare and complete a base for your garden building using the suitable material of your choice.
Please note: It is strongly advised that you build your base slightly larger than the dimensions of the garden building (add approx. 30-40mm to each side).
Concrete Base Method
This method is strongly recommended for larger garden buildings.
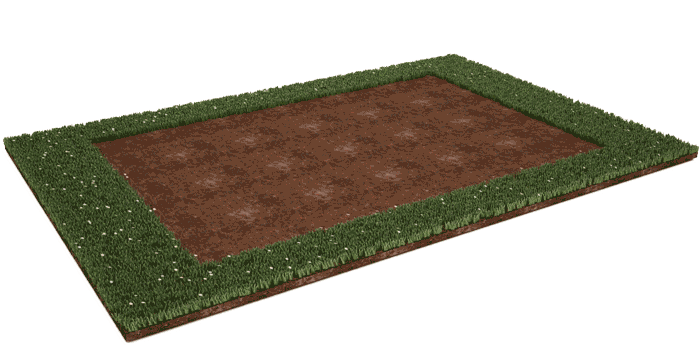
- Remove any vegetation from the area where you have chosen to construct your base
- Use pegs and string to mark out an area for your base. Measure the lengths between opposite angles to ensure the area is square and not slanted. These lengths will be equal if the base is square.

- Excavate the ground in the marked out area to around 6” (150mm) deep.
- Within the excavated area, lay approximately 3” (75mm) of firmly compacted hardcore, scalping or brick rubble to act as a sound foundation and level with compacted sand if appropriate. You may wish to use a rake to aid with the levelling process. Remove the pegs and string.
- By measuring, cutting and fitting timber rails or steel shuttering to the shape of the base, board up the base as portrayed in the diagram. Use a tape measure, spirit level, and tri-square to ensure the base with shuttering is 100% level and square.
- You should then lay approximately 3” (75mm) of concrete. Concrete can be produced using either bags of dry mixed concrete with small amounts of water added at a time, or making a mixture of ‘all-in’ ballast, cement and water. For this second alternative, it is mixed in the ratio of 1 part of cement for 5 parts ‘all-in’ ballast. ‘All-in’ ballast is sold in 40kg bags at most building merchants or DIY stores (Note approx 1.25 will be required to produce around 1 cubic foot of concrete). Do not allow the mix to become too wet as this will weaken the concrete.
- Spread the concrete evenly in the shuttering, taking particular care to push the concrete into the corners and edges. Arguably the best method to lay the concrete is to do it a layer at a time and compact it until the shuttering frame is full. Leave the concrete flush with the top of the framework and smooth it out using either a wooden or plastic float.

- The concrete must then be covered over with sheets to allow it to dry naturally. Please note however that the concrete must not be allowed to dry out too quickly and so spraying it with water may be necessary, particularly in warm and dry weather conditions.
- Once firm and dry the base is now ready for you to begin assembly of your garden building.
Paving Slab Method
- Remove any vegetation from the area where you have chosen to construct your base.
- Use pegs and string to mark out an area for your base. Measure the lengths between opposite angles to ensure the area is square and not slanted. These lengths will be equal if the base is square.
- Excavate the ground in the marked out area to around 2.5" (63.5mm) deep. Remove the pegs and string.

- Within the excavated area, lay approximately 1.5" (40mm) mix of one part cement to eight parts building sand. This will create a dry sand and cement mix. Level this mix - you may wish to use a rake and a spirit level to aid with the levelling process.

- Starting from a corner lay the paving slabs and tap down with a rubber mallet. The surface of the paving slabs should be slightly higher than the surrounding ground to encourage rain water drainage. Use a spirit level to make sure all the slabs are square, level and firmly butted together.
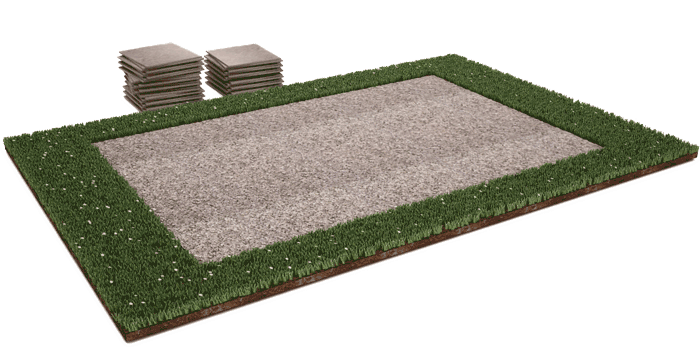
- Brush off any excess sand and cement mix - the base is now ready for you to begin assembly of your garden building.
Timber Bearers Method
- Remove any vegetation from the area where you have chosen to contrast your base.
- Use pegs and string to mark out an area for your base. Measure the lengths between opposite angles to ensure the area is square and not slanted. These lengths will be equal if the base is square.
- Excavate the ground in the marked out area to around 2" (50mm) deep. Remove the pegs and string.
- Within the excavated area, lay approximately 1.5" (40mm) gravel or soil. Level this mix - you may wish to use a rake and a spirit level to aid with the levelling process..

- Lay either concrete floor bearers or pressure treated (tanalised) timber bearers across the gravel/soil. These should be equally spaced at intervals of approx 400-600mm ensuring they are to run perpendicular to any floor joists which already come built in to your garden building.
- Make certain that all floor bearers are level with one another by using a spirit level. Use a rubber mallet to tap down the bearers if necessary.
- How many floor bearers will I need?
This is dependent completely on the size of your shed. For the majority of our Wooden Sheds, there are preattached bearers on the underside of the floor running the length of the building. However, for the 10x8 and 12x8 buildings with 28x44mm framing, the bearers will run the width, as do many TigerFlex sheds and summerhouses (so please check beforehand). You will need to take this into account when planning the number and size of additional timber bearers you require – here’s a few examples;- 6x4 garden building – at least 4 bearers at 1150mm (4ft) long
- 7x5 garden building – at least 4 bearers at 1450mm (5ft) long
- 8x6 garden building – at least 5 bearers at 1750mm (6ft) long
Need more information about building a shed?
If you need further advice about constructing or installing your new garden building, our help centre contains all the information you’ll need.